Salesforce Commerce Cloud QA test suite is one of the latest features introduced in the Storefront Reference Architecture (SFRA). You can use this feature to test applications end-to-end without using any third-party testing framework. It is recommended to upgrade to SFRA from SiteGenesis, if you want to utilize this feature. The SFRA repository provides default-test scenarios for pages, like account page, home page, checkout page, etc., that can be added or modified based on your business requirements.
Advantages of Using the QA Test Suite with Salesforce Commerce Cloud
- Easily conduct testing for SFRA with standard Node Package Manager (NPM) commands without installing additional tools.
- Perform customization in the cartridge as a layer on the top of the base cartridge without editing the base cartridge, i.e., app_storefront_base.
- Since it provides scenarios for all pages by default, it stores all additional scenarios under a test folder.
- These scenarios can be easily customized—you can remove the default scenarios to write customized scenarios.
- Include integration, unit, and functional tests in your SFRA development process.
- Reuse the code in the application to eliminate the duplicity in the code and perform automation of the scenarios by default.
- For the test suite, define all negative and positive test scenarios.
- The test suite combines specification and the test itself is defined in terms of ''given/when/then.”
- Enable faster feedback cycle for the newly developed features via test automation.
- The test suite helps the team in saving time and reducing business expenses.
- Improve accuracy and get higher test coverage compared to the manual test cases.
However, since every advantage comes with a corresponding shortcoming, let’s take a look at some of the limitations of the QA test suite below:
- You can't run test cases using their cartridges since SFRA provides a base cartridge.
- All the changes are made only on top of the base cartridge. For every minor change, you must upload cartridges based on the path.
- It takes more time to compile all controllers and ISML files.
- It’s not possible to have complete automation of all the tests as they are limited to predefined test steps.
Steps to Integrate the QA Test Suite with Salesforce Commerce Cloud
The following steps are for the latest version of SFRA 4.4.1.
Step 1: Clone the SFRA's latest repository, storefront-reference-architecture-master.
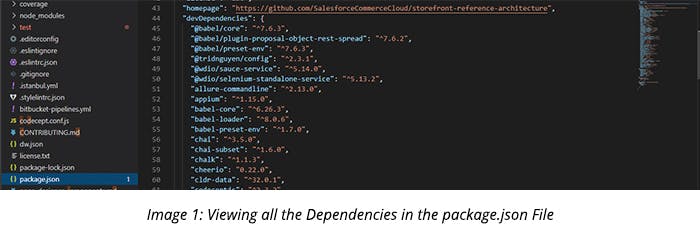
Step 2: To get all dependencies into the local, run ‘npm install.’ Once the command is executed, you can view all dependencies in the package.json file.
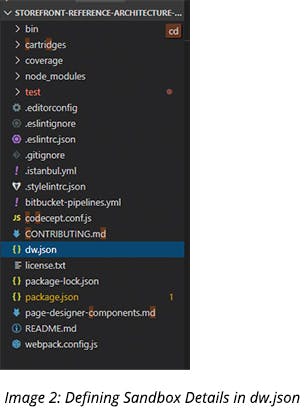
Step 3: Create 'dw.json' file in the root of the project.
```json
	{
    	"hostname": "your-sandbox-hostname.demandware.net",
    	"username": "yourlogin",
    	"password": "yourpwd",
    	"code-version": "version_to_upload_to"
	}
EX:
	{
    	"hostname": "dev99-t01-toy.demandware.net",
    	"username": "your.emailid@client.com",
    	"password": "your sandbox password",
    	"code-version": "your code version in BM"
	}
This file is located in dw.json as shown below:
Step 4: Run ‘npm run compile:js’ from the command line that would compile all client-side JavaScript files. Run ‘npm run compile:scss’ and ‘npm run compile:fonts’ that would do the same for CSS and fonts.
Step 5: Run ‘npm run uploadCartridge.’ It will upload ‘app_storefront_base,’ ‘modules,’ and ‘bm_app_storefront_base’ cartridges to the sandbox you have specified in the ‘dw.json’ file.
Step 6: Add the ‘app_storefront_base’ cartridge to your cartridge path in _Administration > Sites > Manage Sites > Sitegen - Settings_
Step 7: Run NPM scripts - Use the provided NPM scripts to compile and upload changes to your Sandbox.
Step 8: Compile your application with the following commands:
* `npm run compile:scss` - Compiles all .scss files into CSS.
* `npm run compile:js` - Compiles all .js files and aggregates them.
* `npm run compile:fonts` - Copies all needed font files. It is usually run just once.
Getting Started with the QA Test Suite for Salesforce Commerce Cloud
Let’s discuss some of the key functions that you can perform with the QA test suite.
Scenarios
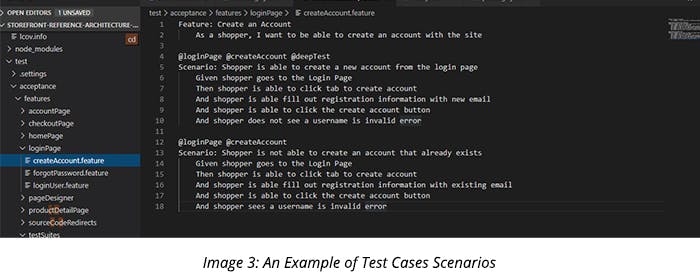
The Storefront includes multiple pages for every page type—home page, address page, account page, login page, etc.—that has positive and negative scenarios available for them. These scenarios can be easily found under a test folder, as shown below:
Examples of Scenarios:
Positive Scenario: Create an Account
As a shopper, you want to create an account with the site
- The shopper can create a new account from the login page
- The shopper goes to the Login Page
- Then shopper clicks the tab to create an account
- And shopper is able to fill out registration information with the new email
- And shopper can click the ‘Create Account’ button
- And shopper does not see a username as invalid
Negative Scenario: Create an Account (Negative)
- The shopper is not able to create an account that already exists
- The shopper goes to the Login Page
- The shopper can click the tab to create an account
- And shopper can fill out registration information with the existing email
- And shopper can click the ‘Create Account’ button
- And shopper sees a username as invalid
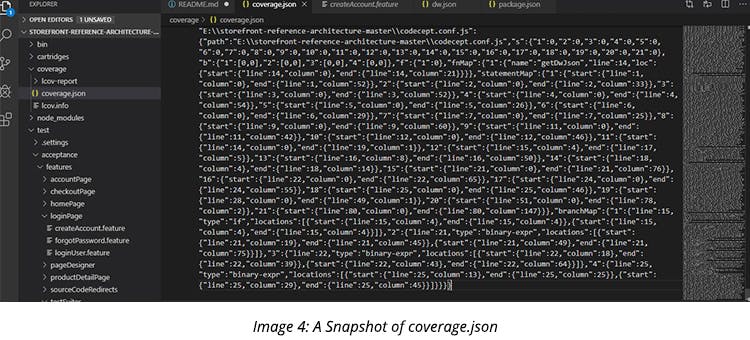
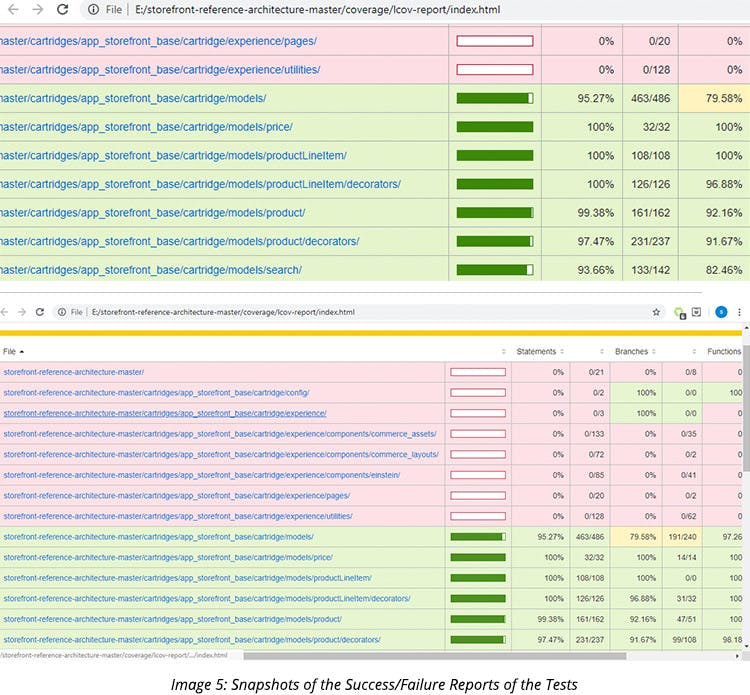
As a user, you can generate a coverage report for all scenarios based on the data and can find all coverage details under the coverage folder. You can open coverage.json to see all coverage details.
For the report generated under the coverage folder, you can find and open Index.html to see the detailed report on the browser.
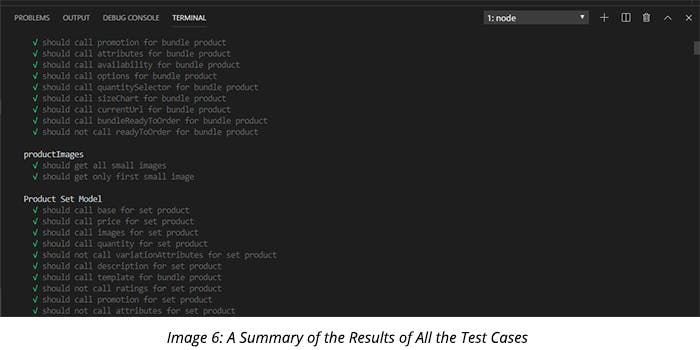
You can see a test case’s success or failure in the terminal while running a command npm cover. In the terminal, it will show all successful and failed scenarios/cases— the successful cases are represented in green color and the failed one are in red.
Linting Your Code Scenarios
The command ‘npm run lint’ execute linting for all JavaScript and SCSS files in the project. You must run this command before committing your code.
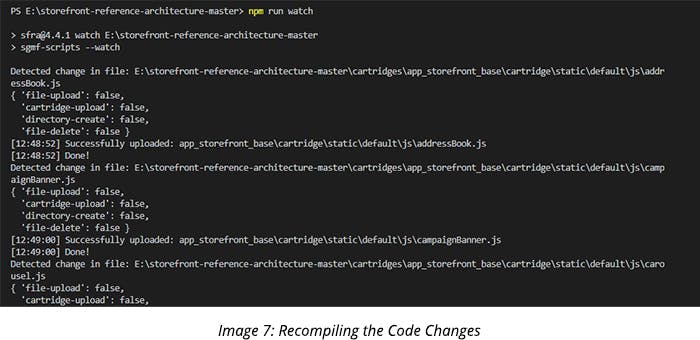
Checking for Changes and Uploading to the Sandbox
The command ‘npm run watch’ watches everything, recompiles (if necessary), and uploads to the sandbox. It requires a valid dw.json file at the root that is configured for the sandbox to upload.
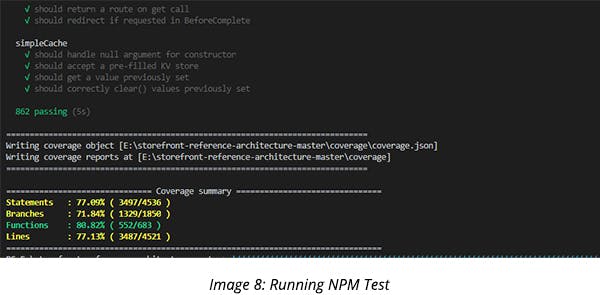
Running Unit Tests
You can run ‘npm test’ to execute all unit tests in the project. Run ‘npm run cover’ to get coverage information. Coverage information will be available in the ‘coverage’ folder under the root directory.
Best Practices for Integrating the QA Test Suite with Salesforce Commerce Cloud
- Prepare cart and account data to validate the functionality of the reports.
- Conduct functional testing, UI testing, regression testing, and system integration testing of the reports.
- Pay special attention to the dynamic nature of visual force pages since it may hinder the process of loading of all webpage elements simultaneously.
- Perform automation testing using tools like Selenium and HP Unified Functional Testing.
- As a Salesforce developer, you must consider both positive and negative scenarios before executing test cases.
- You can construct and test your role using the workflows.
With the latest QA test suite, you do not need any external testing framework to test your application as it allows the rapid testing of applications. It will cater to most of your testing needs but does have some limitations. However, it is much convenient to construct cases and test workflow using an internal QA test suite as compared to an external tool.

Vidhyasagar Regulapati
Sr. Software Engineer
Published Aug 24 2020